What is the easiest way to do a cartwheel?
The easiest way to do a cartwheel is to try the “V” cartwheel. This is a regressed version of a cartwheel that the majority of people can do. This cartwheel is done by attempting your cartwheel in a “V” shape, instead of the traditional straight line. This will eliminate most of the mobility and coordination requirements that might prevent you from doing a normal cartwheel. The “V” Cartwheel is a great variation for people who feel comfortable bringing their hands down to the floor, but struggle to move laterally without feeling scared or losing their balance. Although this regression might not be straight or pretty, it is a good jumping off point for many people starting to learn.
The cartwheel is a fun and simple acrobatic movement that almost anyone can do with some practice. Although there are many variations to the cartwheel, this variation is a great starting point gymnastics, calisthenics, and other bodyweight movements.
The V Cartwheel
As mentioned earlier, the “V” cartwheel is one of the best places to get started if you want to do a cartwheel. This is not a “hack” or a shortcut. The “V” cartwheel is exactly what it sounds like. A cartwheel in the shape of a “V”. Moving in this shape, provides a lot more security. It feels less exposed or intense than a normal cartwheel. Get started by doing your “V” cartwheel in a very narrow “V” shape. Make the movement more difficult and more like a cartwheel by widening your “V”, until you are moving in a straight line.
Cartwheel Progress listed out
If this still feels too intense for you, consider starting with your hands on the floor and simply kicking your feet up into the air, side to side. The timeline below, along with the videos will give you an idea of how to increase the difficulty, until you are doing a “V” cartwheel.
Beginner Cartwheel level 1
Beginner Cartwheel level 2
- Hands on the floor jumping side to side. Legs barely get off the ground
- Hands on the floor jumping side to side. Legs reach hip height
- Hands start hovering over the floor and jumping side to side. Legs reach hip or shoulder height
- Hands start 1 foot off the ground and jumping side to side. Legs reach head height
- Hands start at hip or shoulder height. Perform “V” cartwheel. Legs reach head height or higher
- Hands start at shoulder height. Perform wider “V” cartwheel. Legs are straight and almost over shoulder
- Start practicing normal cartwheel (moving laterally in a straight line)
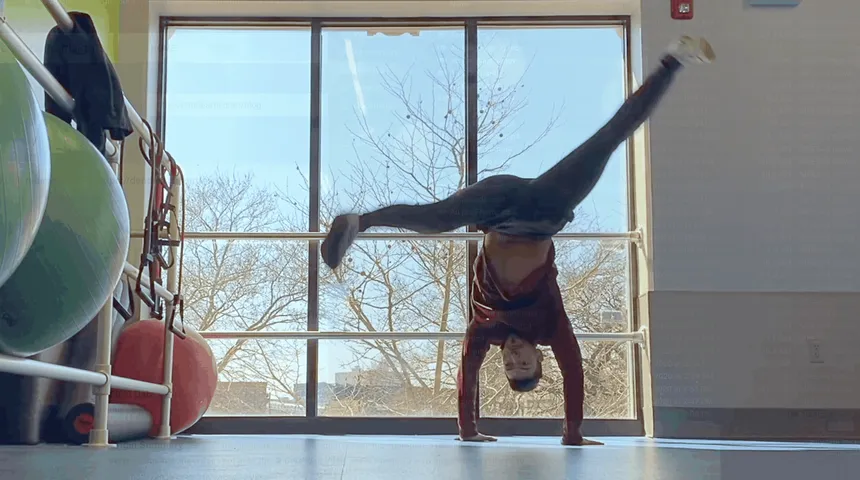
A normal cartwheel is done in a straight line. Most people lack the confidence to throw their legs over their bodies. The result is that the legs do not go as high as they can and making the cartwheel a little ugly. This is nothing to get bummed about. Practice makes perfect and slow progress is better than not trying.
Once you feel that you have a strong grasp on a particular variation, then move onto the next one. Keep doing this until you think you’re ready to do a full cartwheel.
Use a piece of tape to practice
A useful bit of advice is to use a piece of tape (or rope) to monitor your progress. Lay the tape down on the ground in a “V” shape. Your goal will be to follow the tape and place all of your hands and feet on it as you do your cartwheel. As you get more comfortable, the goal will be to re-align the tape so that it’s straighter and straighter each time you use it. After a bit of practice, you should be able to do your cartwheel on a relatively straight piece of tape.
Using tape does two things for us. First, it helps us monitor our progress. This is so important for making sure we stay motivated. If you don’t feel like you’re improving, it’s going to be a lot harder to stay focused. The second benefit is that it orients our cartwheels. Doing any skill where your head goes down and your feet go up can be really disorienting. Using tape is a good way of keeping track of where you are in space and not getting that disorientating feeling.
Bigger cartwheels are more stable cartwheels
It might sound counterintuitive, but doing a larger cartwheel is more stable than doing a smaller one. Grab as much space as you can. The power and force in your cartwheel gives you balance as you do the movement.
Doing a smaller cartwheel is much more difficult and considered an intermediate level skill. It might feel safer to do the cartwheel small, but in fact, you are making it harder on yourself.
Make your cartwheel’s bigger by taking a larger initial step and reach far with your hands. In order to do a bigger cartwheel, you will need power. Make sure you push hard off the forward leg as you start the cartwheel, and that the back leg kicks out hard to the side.
Kick hard with the back leg
This is one of the most neglected parts of doing a cartwheel. The back leg needs to be kicked hard to the side. Without this power, it will be much harder to do a cartwheel of any kind. Kicking hard can feel scary at first, but it not only provides power to your cartwheel, but a lot of stability.
You can practice this movement standing in front of a wall. Swinging your foot back and forth trying to generate as much power as you can.
Train your cartwheels slow
Slowing down your cartwheels is a fun way to vary your training while focusing on skills that will help with more advanced variations. Doing a cartwheel slowly is considered a more advanced skill. The main benefit is that it teaches you how to control the movement. If you want your cartwheels to get to the next level, then try doing “V” cartwheels or normal cartwheels at half speed.
A common fear: I’m scared of hitting my face on the floor
This is a very common fear. Most people feel as though their arms might give out, letting their faces come crashing down to the floor. I felt the same fear, but incredibly, this never happened to me or anyone that I’ve taught. If this is an overwhelming fear that you have, then the best way to overcome it is to make baby steps.
If you feel comfortable when your hands are on the floor in the starting position, then try adding another layer of difficulty. Practice bringing feet moving a little higher in the air, and start with your hands hovering above the ground. By challenging yourself slightly above your comfort level, you’ll improve your technique and slowly get rid of your fear.
How long does it take to learn a cartwheel?
Learning a cartwheel can take as little as a few weeks to learn, up to a few months. This will depend on your current fitness level, flexibility, and coordination. For those who have better flexibility and coordination, it may take only a couple of weeks to develop a strong cartwheel. It is very common to see a great deal of progress after only a of couple practice sessions. After a practice session, the brain quickly goes to work figuring how to cartwheel more efficiently for your next attempts.
The best way to measure your progress is to lay down a straight piece of tape and see if you can land your hands and feet on that piece of tape as you do your cartwheel. As you technique and coordination improve, your ability to keep your hands and feet on the tape will also improve.
Stretches to improve your cartwheels
Stretches that improve flexibility in the hamstrings, lower back, and groin are very beneficial to improving your cartwheel.
- Hamstrings
- Groin
- lower back
- Overhead shoulders
There are many ways to improve your flexibility in these areas. Here are a few stretches you can use.
Hamstring stretches
We can dynamically stretch our hamstrings starting with our hands touching the floor. Keep your back straight and bend your knees enough so that you’re can touch the floor with your fingers (or entire palm). Straighten your legs as much as you can without losing contact with the floor. Once you reach the apex of your movement, come back to the start of the movement. Repeat at least 10 times and hold the last repetition.

Dynamic lateral kicks for the groin
Hand on to a chair or wall for stability as you do your kicks. Point your heel in the direction of your kick. Swing the other leg laterally and make sure it is straight throughout the movement. As you kick raises up high, your upper body will naturally lower - this is good. Make sure to do this stretch on both sides. (yes, this is the same exercise as before! that’s how important it is!)
Lower Back Stretch
stand with one leg crossed over the other. Reach your hands up in the air and clasp them together. Next, lean to one side. If you lean to the right, then you will be stretching your lower back on the left side. Intensify the stretch by increasing the lateral bend. Hold this position for about 10 seconds before switching sides.

Overhead Shoulder Mobility
Start by sitting against a wall, making sure your lower back is pressed against the wall. Point your forearms up and glue them to the wall. Begin sliding your forearms upwards, making sure to maintain contact with the wall for as long as you can. Once they are as high and as straight as you can make them, slide your forearms back to their starting position. Make sure to keep the lower back pressed to the wall throughout the duration of the movement.


Cartwheels and cartwheel variations
Once you can do your cartwheels with straight legs and in a straight line, then you know you have some competency with the movement. Once you develop this skill, it’s a great idea to move onto other variations, which roam into the realm of hand balancing. Au fechado (A cartwheel with your legs tucked into your chest), is one example.
These cartwheel variations require a lot of control, coordination, and conditioning. Practicing your basic cartwheels is a great way to build the foundation needed for these other variations.
If you’re curious about other cartwheel variations, here is another article that goes through many cartwheel variations. Many you probably didn’t even know existed.
https://dendearts.com/list-of-cartwheel-progressions-from-beginner-to-hardcore/